The Perfect Food for Your Outdoor BBQ: Grilled Pizza
Next time you fire up the grill, try making your favorite pizza
/https://tf-cmsv2-smithsonianmag-media.s3.amazonaws.com/accounts/headshot/shaylyn-headshot.jpg)
/https://tf-cmsv2-smithsonianmag-media.s3.amazonaws.com/filer/07/c3/07c37f0e-57ae-4d26-a101-15dc1fcd8171/pizzaa-highres.jpg)
It’s the season to fire up that grill. But, forget about burgers, hotdogs, and chicken wings and try grilling some pizza. It may not be the first choice for a festive barbeque, but once you try a slice of this smoky, crispy heaven, you will have a whole new appreciation for that grated open flame. Most home kitchen ovens cannot reach the high temperatures needed to give pizza crust that infamous crunch, so grilling is a great way to get that traditional Neapolitan flavor in the home.
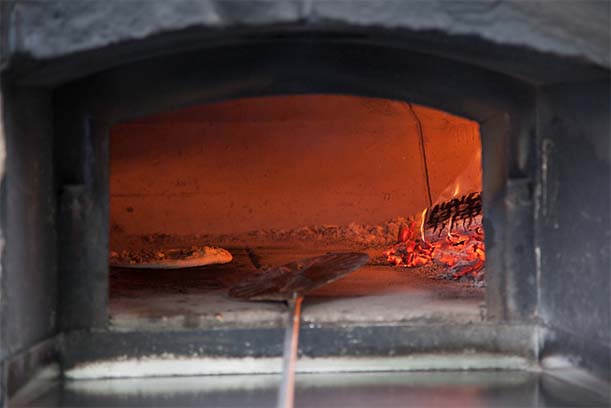
The grill is the closest thing to a brick oven and is therefore a great tool for making pizza. (Photo courtesy of Flickr user BurnAway).
There are two basic ways to grill pizza: directly on the grate or a pizza stone. Both have their advantages: charring the dough on the grate gets you an extra smoky flavor, but a pizza stone, the closest thing to the bottom of a brick oven, stabilizes the heat to cook the pizza throughout, making the crust extra crispy.
The Pizza:
The first step in making any pizza is the dough. Pizza dough is pretty simple to make, but you can make the whole process easier by buying already made fresh pizza dough at a local grocery or specialty food stores (another option is to ask your local pizzeria for a slab of dough.) Whether you make it yourself or buy it from an outside source, make sure you allow the dough to rise. In general, the dough should be placed in a bowl covered with a damp cloth in a warm room for about an hour before using. Keeping it in the kitchen is fine; just don’t put it in the refrigerator or underneath a cooling system. For the dough to rise properly, it needs to be kept at a warmer temperature, which will allow the dough to stretch and make that bubbly crust.
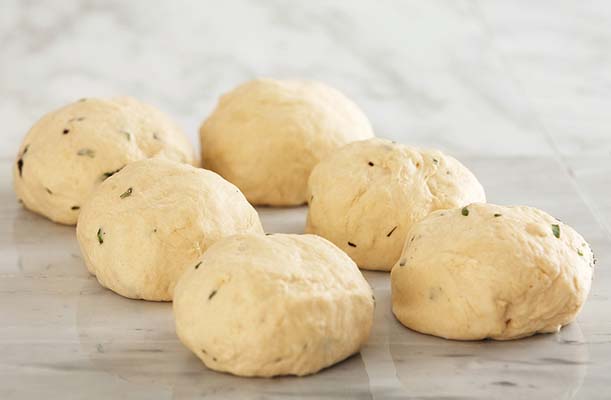
(Photo courtesy of Flickr user Breville USA).
Once the dough has risen, prepare it for the grill just as you would for the oven. Roll it out and flip it (without dropping, of course), but, make sure you don’t drop it. Also, be careful not to roll or stretch the dough out too thin, especially if you are grilling directly on the grate.
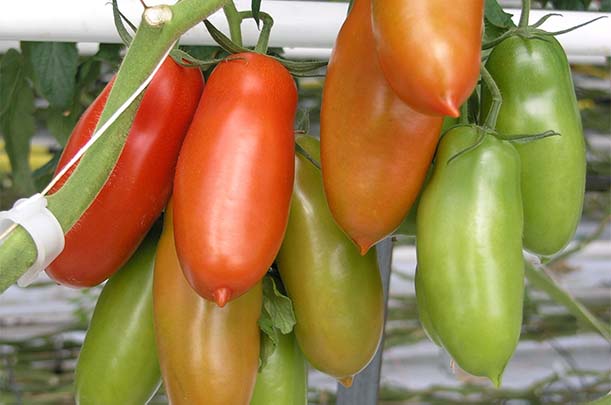
San Marzano tomatoes on the vine. (Photo courtesy Wikimedia Commons).
For a tomato base sauce, instead of buying a can of pre-made pizza sauce, get a can of whole peeled San Marzano tomatoes. San Marzano tomatoes are sweeter, longer, less seedy and less acidic than their parent plum tomatoes. To make the tomatoes easier to spread on the dough, put the can of tomatoes either in a large bowl to blend (for just a few seconds) with a hand blender or in a food processor so the tomatoes are still chunky and get that extra sweetness in each bite. Just add a little, salt, pepper, garlic salt and mix with a spoon, and you are done.
For a gas grill, turn the heat to high, close the lid and wait until the temperature reaches about 500-600 degrees Fahrenheit. For charcoal, you want to make sure you close the lid and open the dampers to let the grill heat and circulate. If using a pizza stone, you want to put the stone in right away and begin heating it with the grill.
If cooking directly on the rims:
(Photo by Flickr user Keith McDuffee).
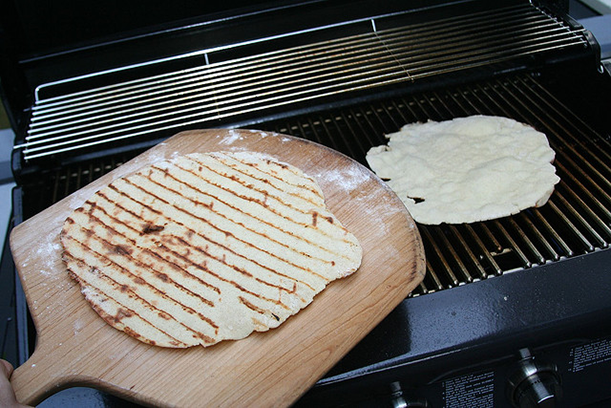
Brush olive oil on one side of the dough with a basting or pastry brush. Put the oiled side face down on the grill, and let it cook for a couple minutes. But, keep an eye on it because the dough can overcook and burn if it is too thin. If it looks like the dough is cooked, then go with your gut over a timer. Once the one side is done, either flip and quickly top your pizza directly on the grill or to be safer, take the dough off the grill completely. Oil the uncooked side and then put the sauce and toppings on the cooked side. Return it to the grill, uncooked side facing down. Cover the grill and cook until cheese is melted and crust is crispy and golden brown.
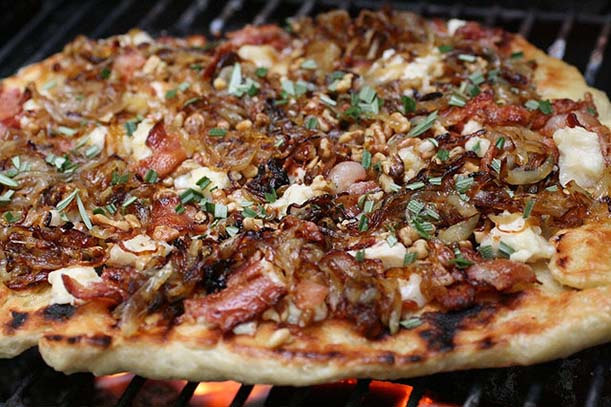
Pizza grilling straight on the rims. (Photo by Flickr user thebittenword.com).
If using a Pizza Stone:
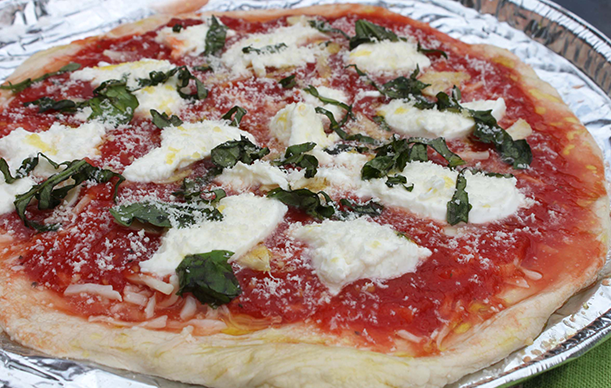
If using a stone, assemble the pizza before putting on the grill. (Photo by author).
Pizza stones need time to heat up before using, so low power and charcoal grills may not be the best for this option. They can also be expensive, but discount homeware or cooking stores, can carry them at a fraction of the cost (I got mine at HomeGoods for $9.99). There are some creative ideas out there for creating your own stone by using quarry tiles that can be found at most hardware stores. When using a more creative route, be careful that there isn’t lead or any harmful materials or chemicals in the product.
Make sure your dough is well floured and prepare it with your sauce and toppings of choice. Instead of brushing olive oil on the dough, after the pizza is all topped, drizzle some olive oil on top. For easy transport, prepare the pizza on a pizza peel or something that it could easily slide off of. A flat cookie sheet could do,(or the back of a rimmed sheet) just be careful and quick, because the high heat of the grill will heat up that cookie sheet fast. Whatever you do, do not touch the stone with your hands. Have a pair of tongs handy if you do not have a peel. Once the pizza has slid onto the stone, cover and cook for about 10 minutes with a watchful eye.
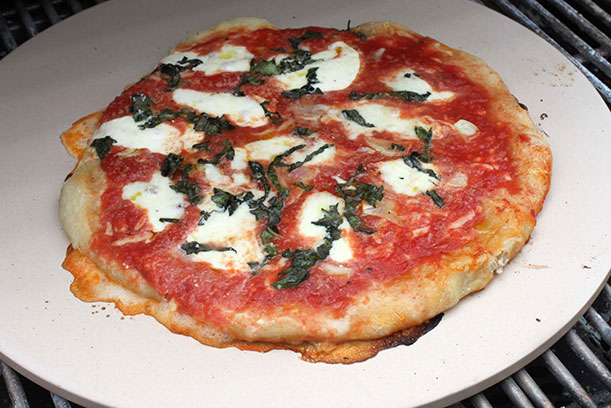
Keep the lid closed when grilling the pizza. But, take a peak here and there to make sure it doesn’t overcook. This one’s not quite done yet. (Photo by author).
No matter what method you use, once the pizza is done, slide it onto the peel or whichever plate, platter or tray you are using, cut, and enjoy!
If you have any ideas or techniques on grilling pizza, please share! One idea is putting the cheese first before spreading the sauce like a good old Trenton tomato pie. This will prevent the sauce from soaking into the crust and create a barrier to allow the crust to get extra crispy. This is a great option if you want that extra crunch, especially if you aren’t using a stone.
/https://tf-cmsv2-smithsonianmag-media.s3.amazonaws.com/accounts/headshot/shaylyn-headshot.jpg)