How to Press Plants from Your Backyard
Here’s a guide to help you press plants from your backyard.
/https://tf-cmsv2-smithsonianmag-media.s3.amazonaws.com/blogging/featured/Press_plants_laying_on_green_grass..jpg)
Spring has arrived. Flowers are blooming and leaves are budding. It’s the perfect time to start a new outdoor hobby — plant pressing! Collect and dry plants from your own backyard to display on your wall, use for art projects or just to learn more about what’s growing around you as you practice physical distancing. Here’s a guide to help you get started.
Find your plants
The beauty of pressing plants is that you can save anything that catches your eye — flowers, leaves or the entire plant.
But there are a few things you should avoid, including taking plants growing on public land. “Sometimes people don’t know that plants in those areas might be threatened or endangered, so it’s really important to collect from an area where you know what you’re getting,” said Erika Gardner, a museum specialist in the Department of Botany at the Smithsonian’s National Museum of Natural History. “Stick to your backyard or ask permission to take from someone else’s.”
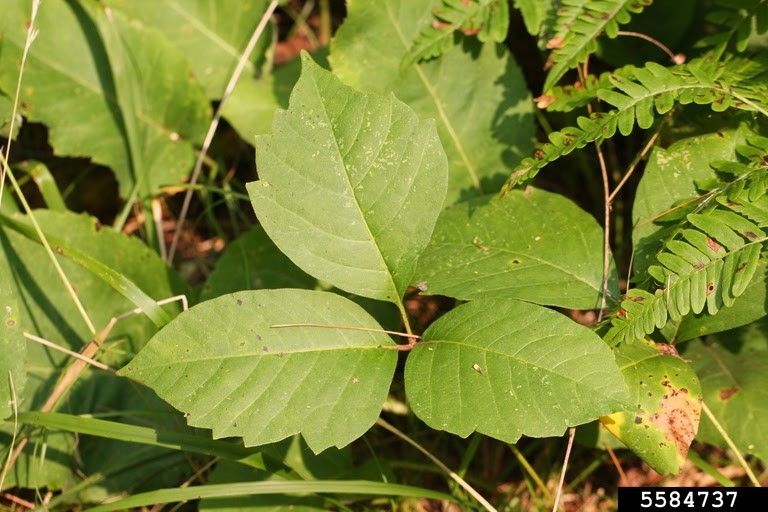
If you don’t recognize a plant, it’s best to do some research first to see if you can identify it. You could have endangered or threatened species living in your backyard, or you could accidentally pick up plants like poison ivy or poison oak. Take plants you already know and use apps like iNaturalist to identify the ones you don’t.
If you want to document plants growing in your backyard year by year, consider collecting weeds too. Weeds take over new areas very quickly and having information about where and when they grow could help you understand how they spread.
Gather your materials
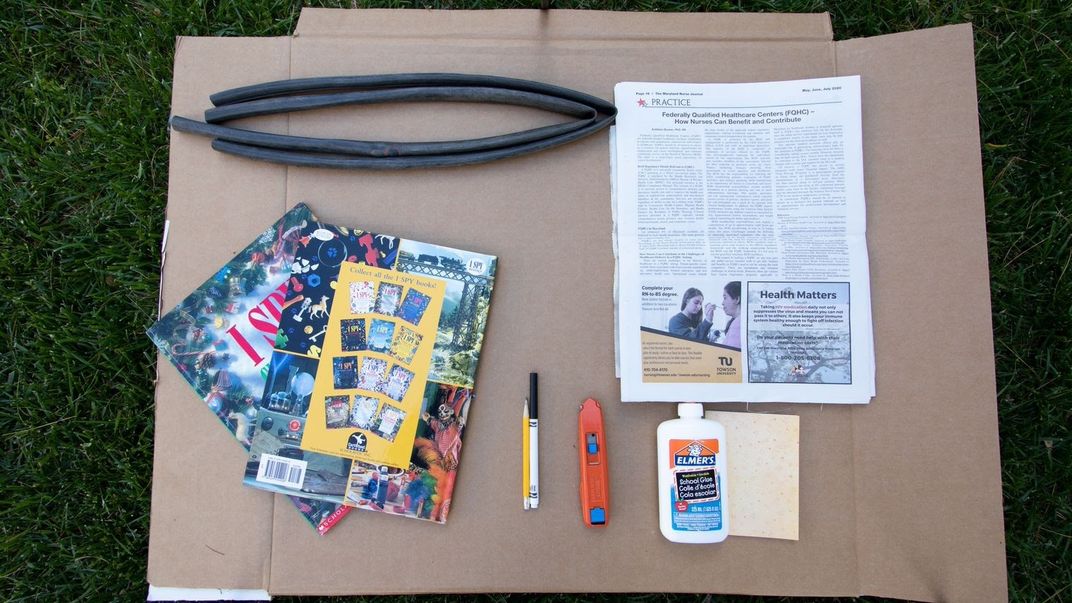
You might be familiar with using books to press plants — like sticking a few flowers between the pages of your dictionary. But this method can harm the pages of your book as moisture leaks out of the plants. Instead, try making your own plant press with a few household materials:
- Cardboard
- Newspaper
- A boxcutter
- A marker of pencil
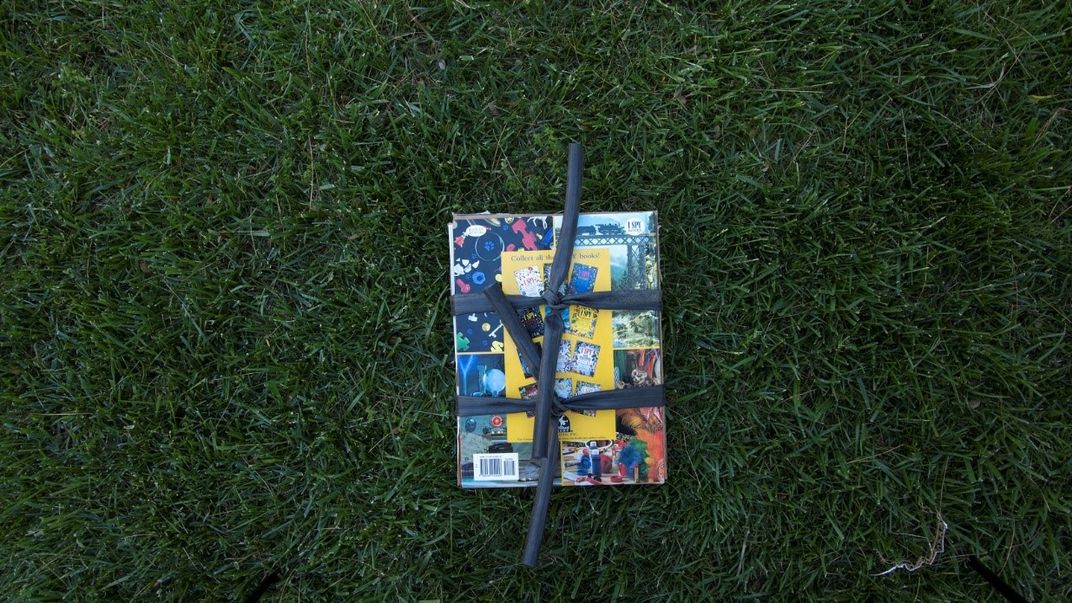
- Two thin hardcover books
- Two straps to wrap around you plant press, like belts or bike inner tubes
If you want to make a miniature plant press for your smaller plants, swap out the books and belts for sturdy drink coasters and rubber bands. This method is great for kids because they can use scissors instead of a boxcutter to cut smaller pieces of cardboard.

Assemble your press
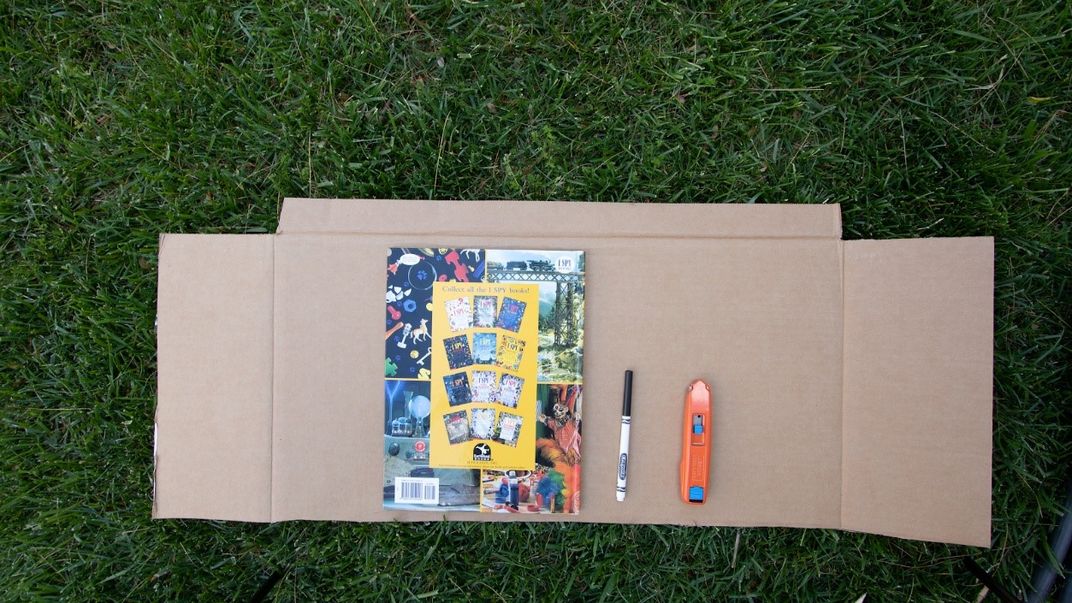
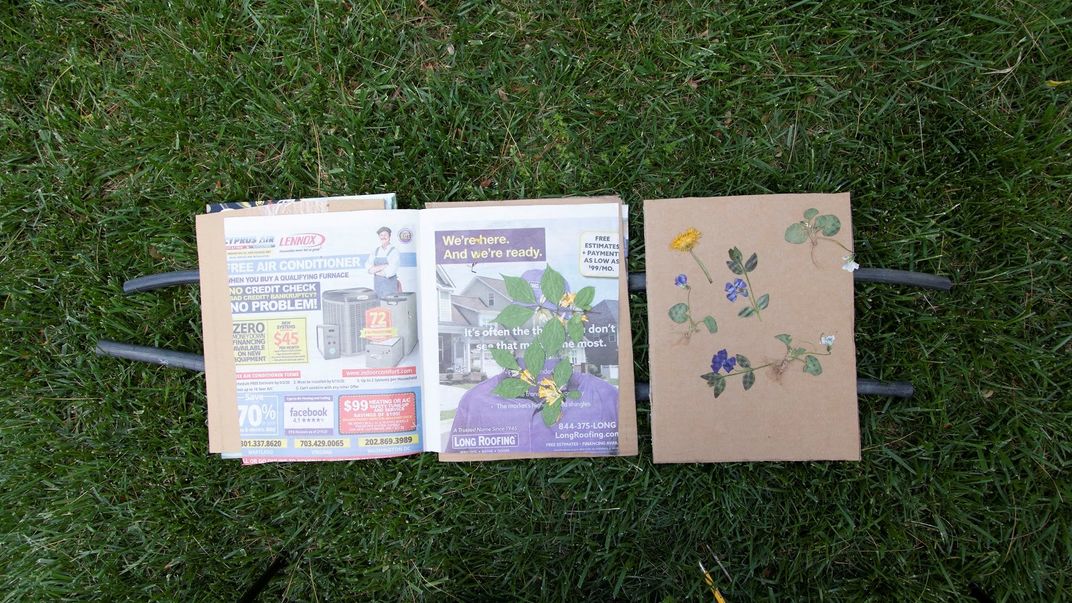
Now that you have what you need, it’s time to put your press together. First, put abook on top of your cardboard and trace it with your pencil. You’ll need at least two cardboard rectangles, but trace as many as you want, depending on how many plants you have. Cut your cardboard rectangles out with the boxcutter. Cut one less sheet of folded newspaper than your cardboard pieces. They should all be the same size and shape.
Place your two belts or straps flat on the ground, and then put one book on top of the straps. Place one cardboard on top of your book and one folded newspaper on top of that. Open the newspaper, place your plant face down inside and close the newspaper. Use your pen or pencil to write the date on the newspaper, where you collected the plant or any other information you want to add.
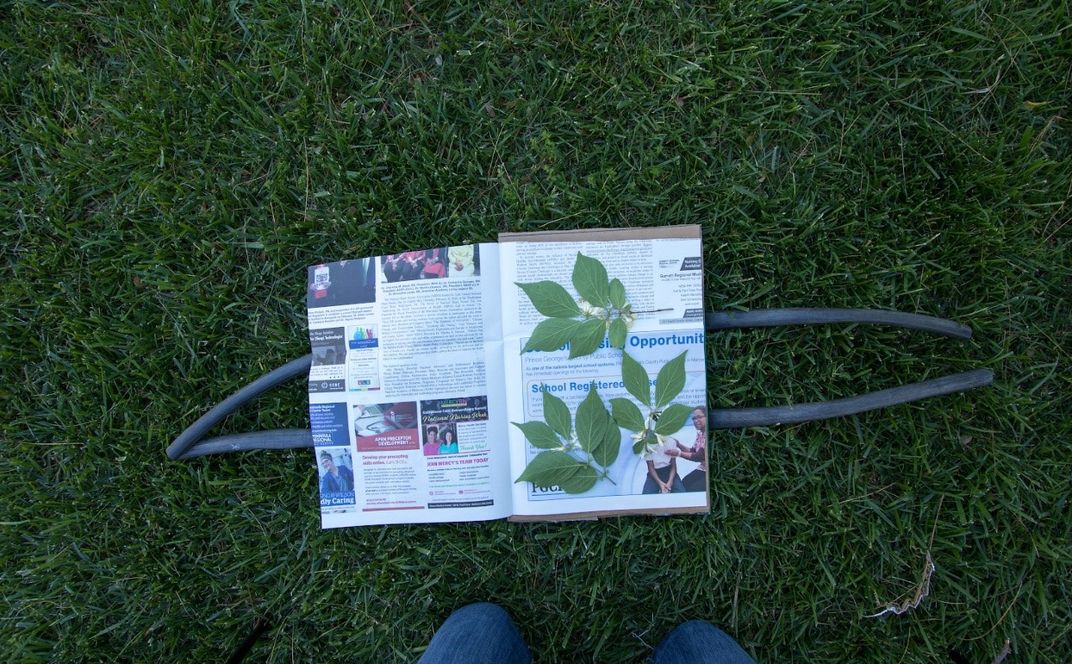
Once your plant is in place, put your second cardboard on top. Continue building a sandwich of newspaper and cardboard layers depending on how many plants you have. When you’ve finished, put your second book on top. Wrap the belts around the entire press and tie them with enough pressure to make the plants tight.
Check your plants
It typically takes about a week for plants to dry. But that could change depending on the type of plants you pressed and your climate. If your house is damp and cold, it could take longer. In any case, take a peek at your plants periodically and change out the newspaper if it gets too wet.
Remove
Untie your straps and carefully open your press. If your plants are delicate, you can use tweezers to remove the plants.
Get creative!
Once you have your beautifully pressed plants, it’s time to think creatively about what you want to do with them. Here are some of our favorite ideas.
Create a plant guide using your dried plants so you can better identify them in the future. You could also use them to decorate your journal, scrapbook or other projects. Glue your plants to acid-free printer paper to preserve them best.
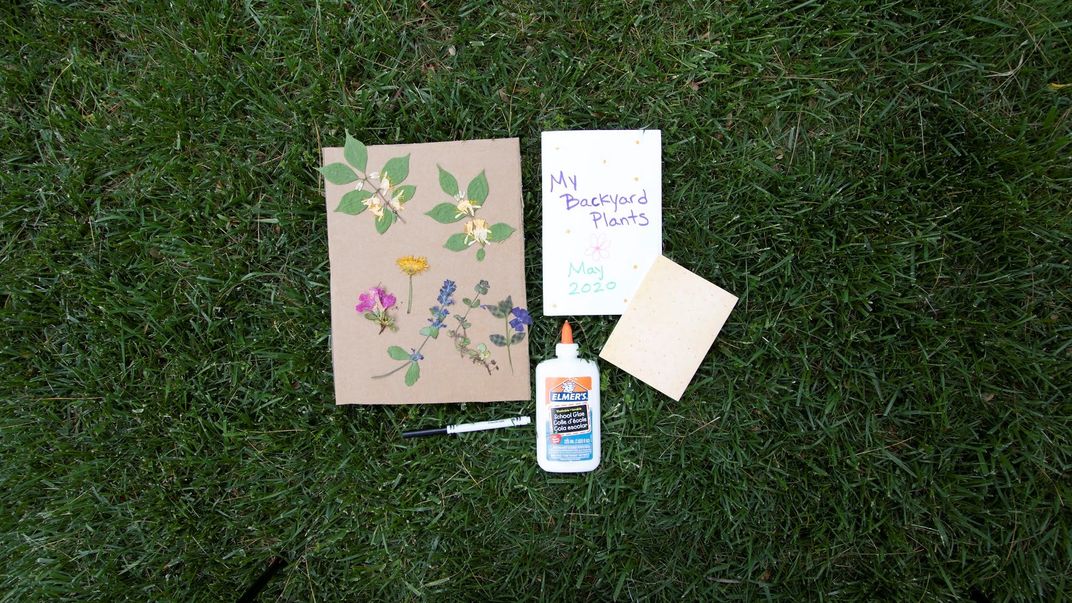
Or you could frame your plant pressings to display on your wall. But keep in mind that UV light can fade the color. A shady area will preserve the colors longer. You can experiment with different leaves and flowers to see which species hold their colors the longest.
You could also practice your art skills. “A lot of illustrations that are made for scientific journals are actually from the pressed plant materials in a museum or an herbarium,” Gardner said. “Fine details are much easier to see on an actual plant specimen than on a photograph.”
Whatever you decide to do, just be creative. Keep experimenting to see what works best for you!
Related story:
Seven Ways to Learn About Natural History From Home
How to Balance Motherhood and a STEM Career
Here's How Scientists Reconstruct Earth's Past Climates